Rinfit · Shopify admin · colour filter
Keeping the colour filter in sync when you unlist or relist a colour
The storefront colour filter reads two fields on each variant: Filter color and Metal colour. Unlisting a colour (removing it from the Online Store channel) hides it in the store, but the filter still sees those fields. So whenever you unlist or relist a colour, update the fields the same way — it takes one to two minutes per colour.
Unlisting a colour
Clear Filter color and Metal colour on that colour's variants.
Relisting a colour
Set them back: the ring's colour, plus the metal for metal rings.
New product
Set them once for every colour. The filter picks the product up within a few minutes.
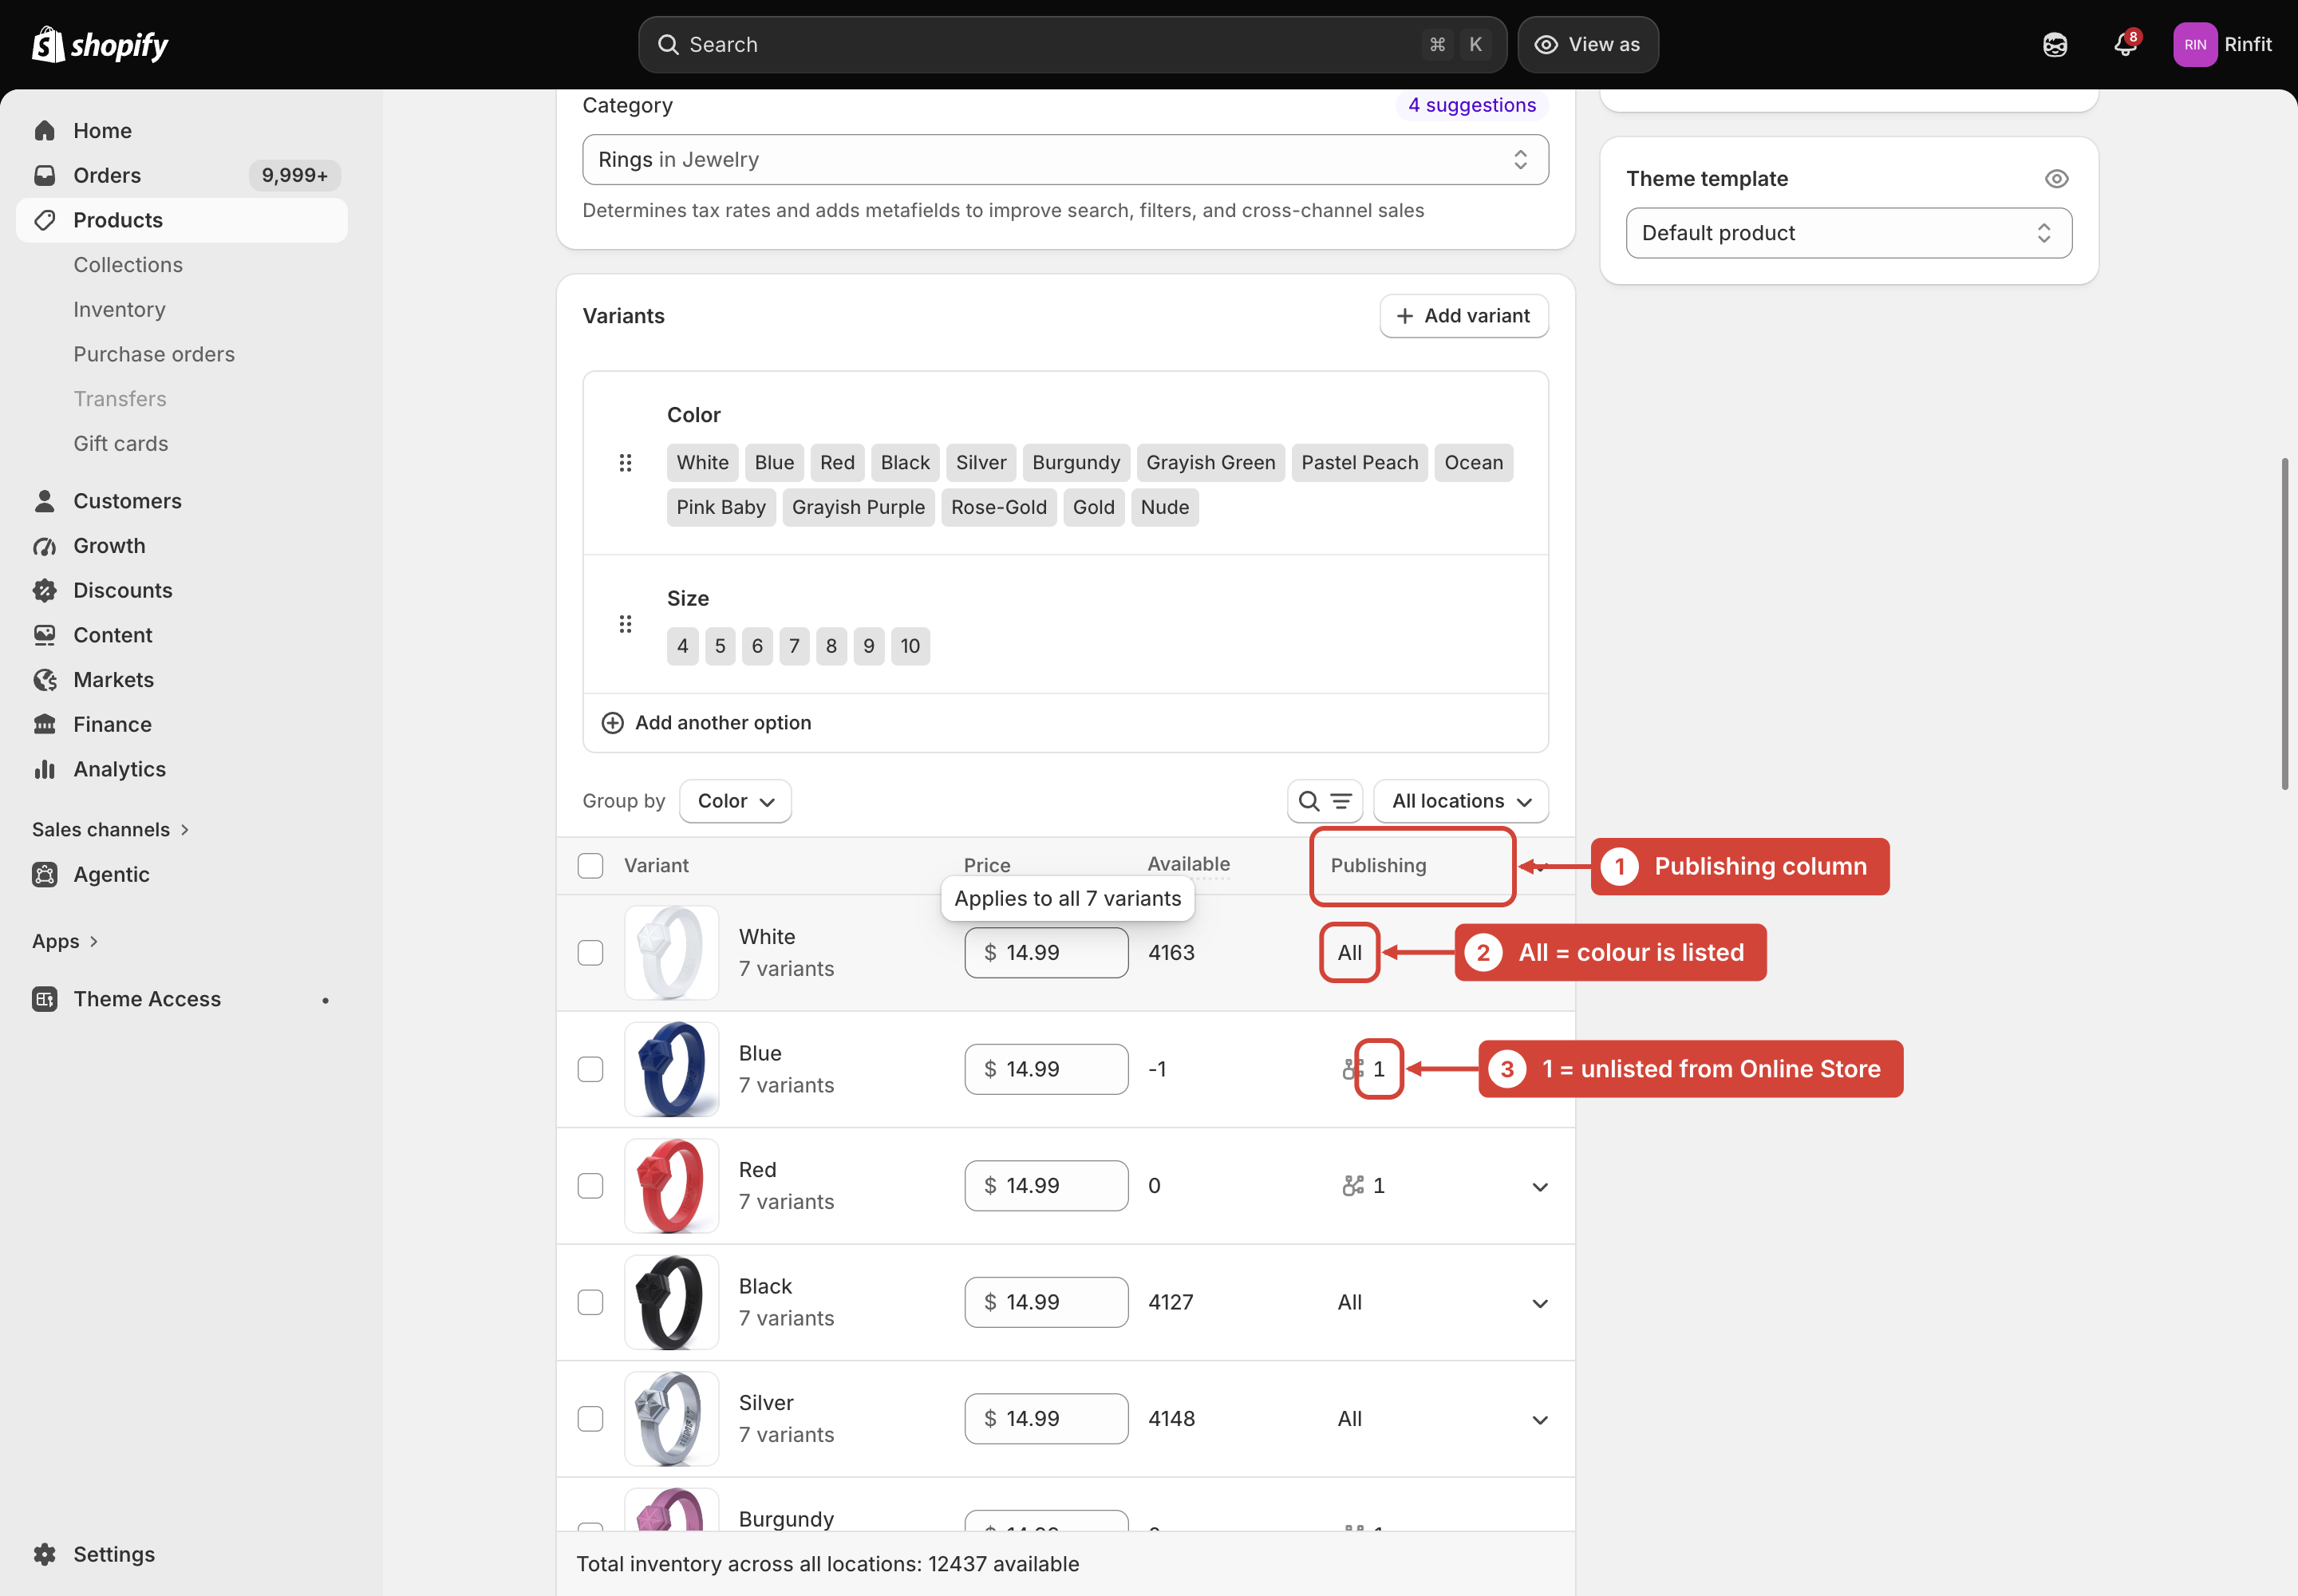
Open the product and scroll to Variants
Variants are grouped by colour. The Publishing column shows All for a listed colour and a number (for example 1) for a colour you unlisted from the Online Store.
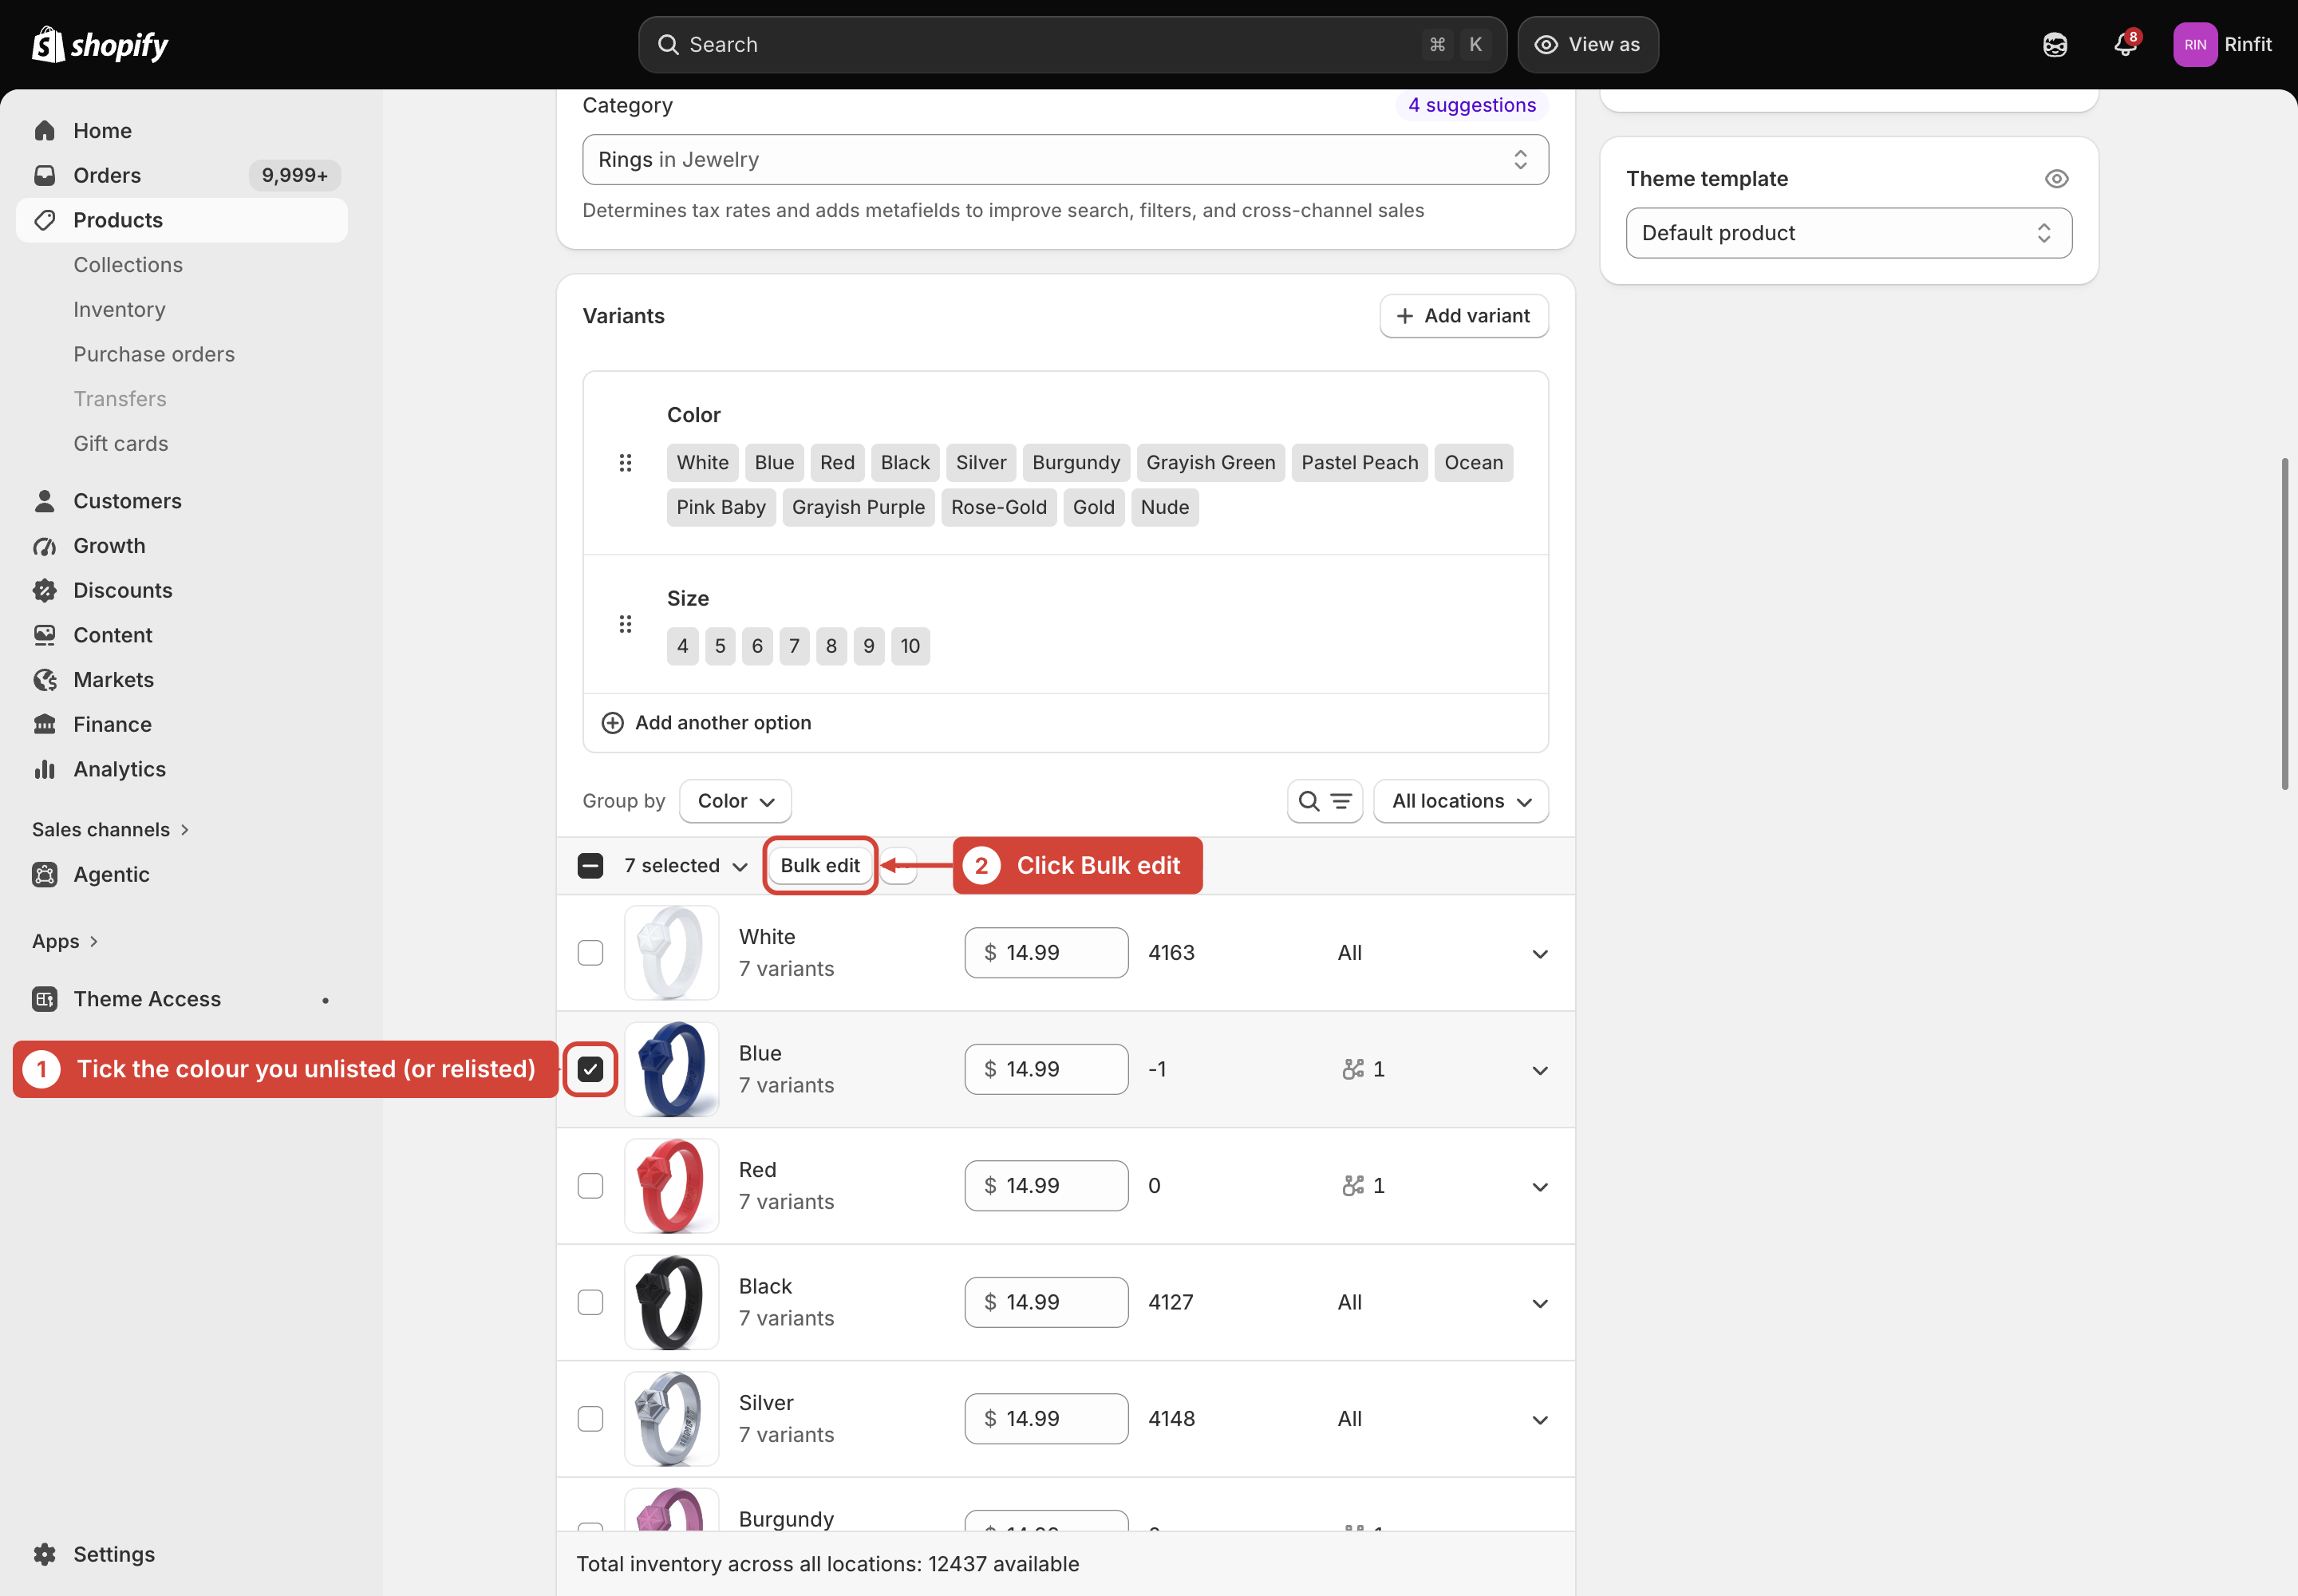
Tick the colour, then click Bulk edit
Ticking the colour row selects all of its sizes at once (7 selected). The Bulk edit button appears in the bar above the table.
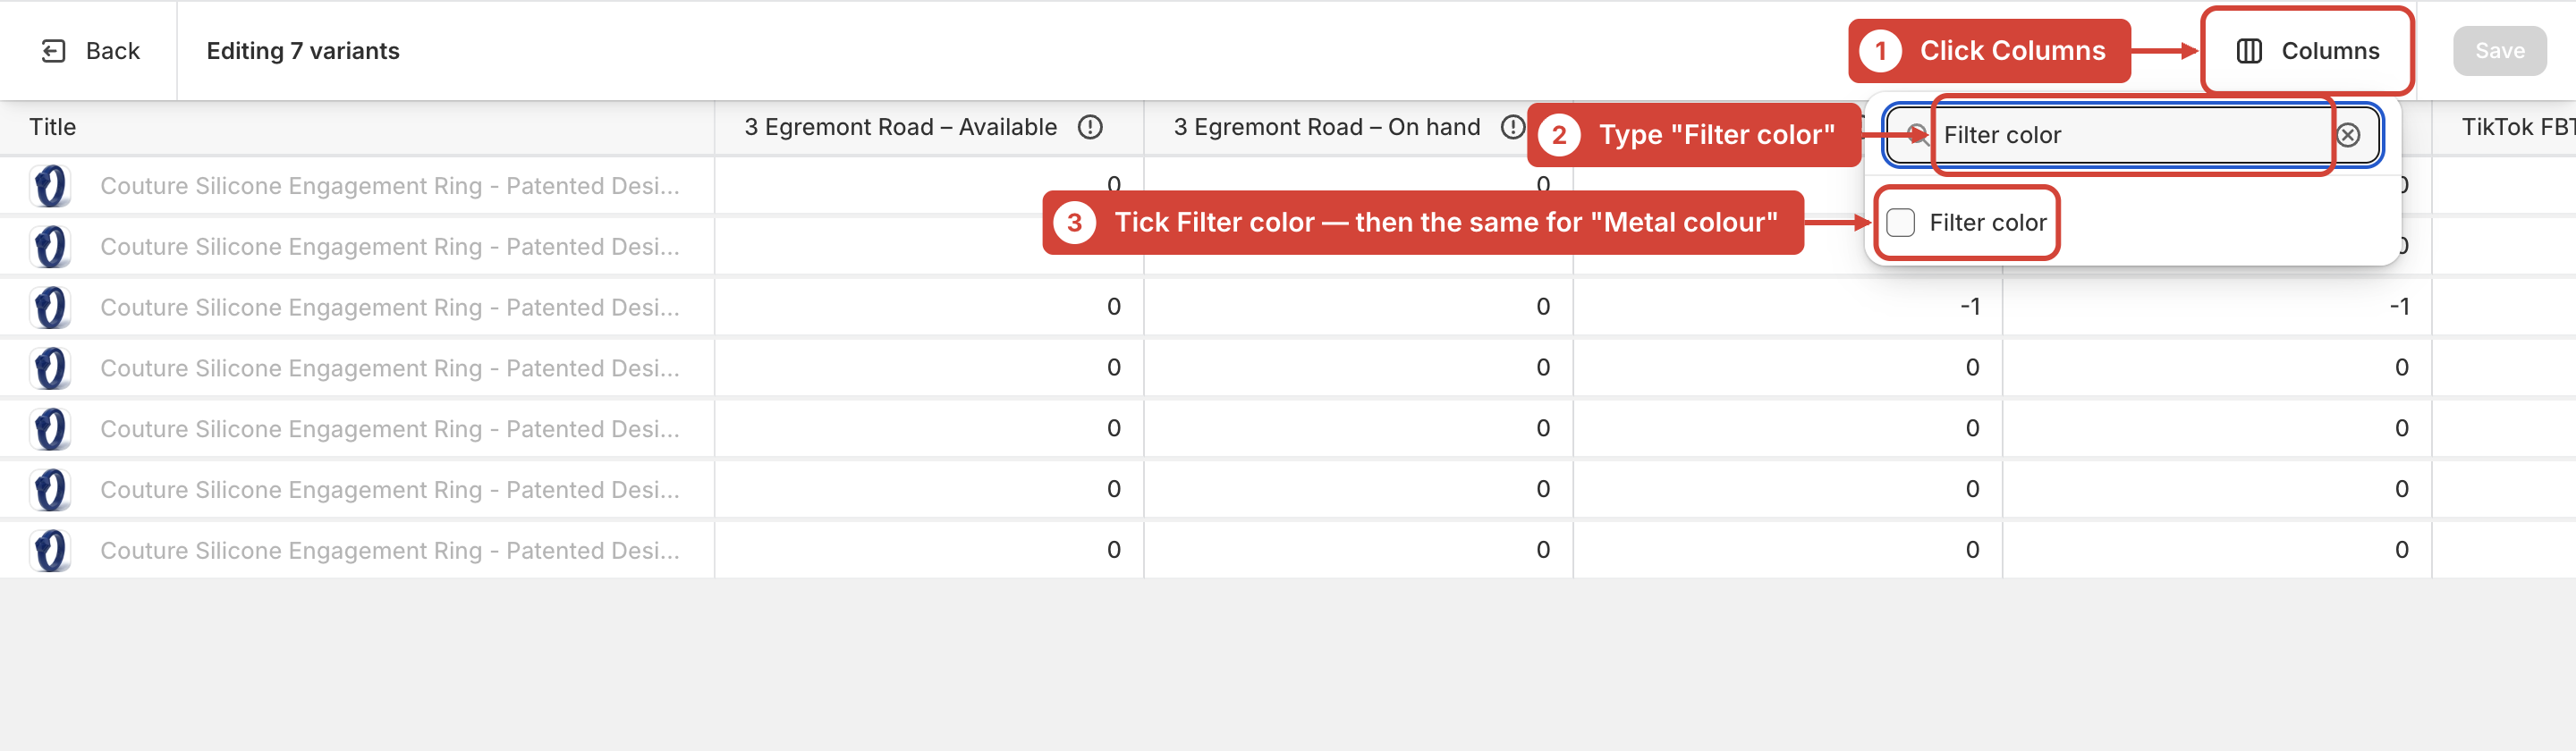
Show the two filter columns
Click Columns, type Filter color and tick it. Do the same for Metal colour. Optional: untick Price, SKU and the location columns for a cleaner view — this changes nothing in the product.
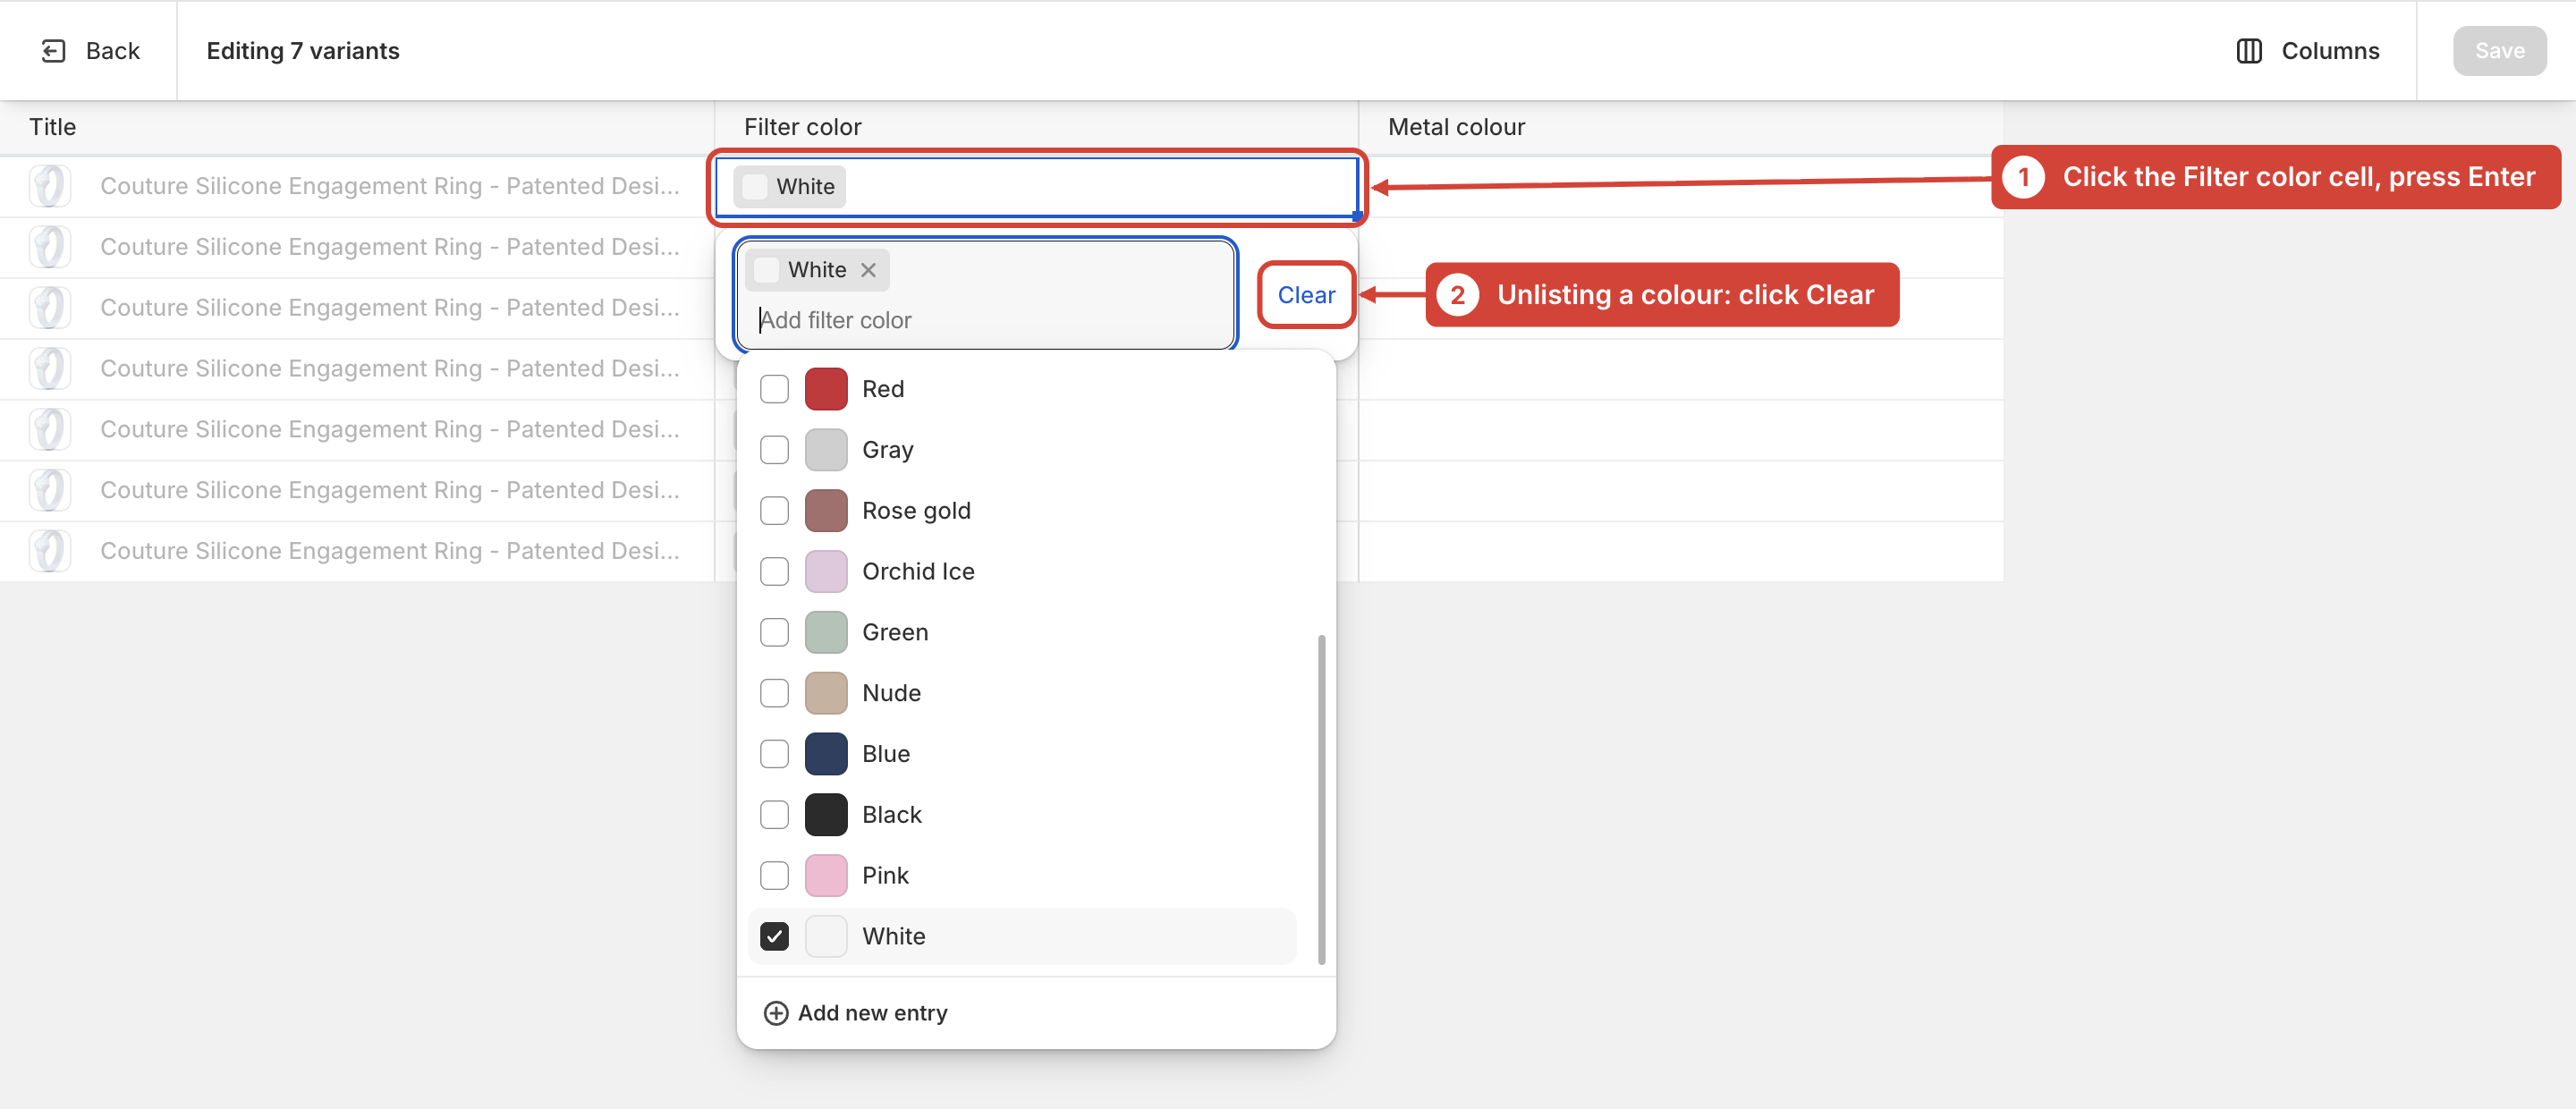
Unlisting: clear the value
Click the first Filter color cell and press Enter. Click Clear. If the Metal colour cell has a value, clear it the same way.
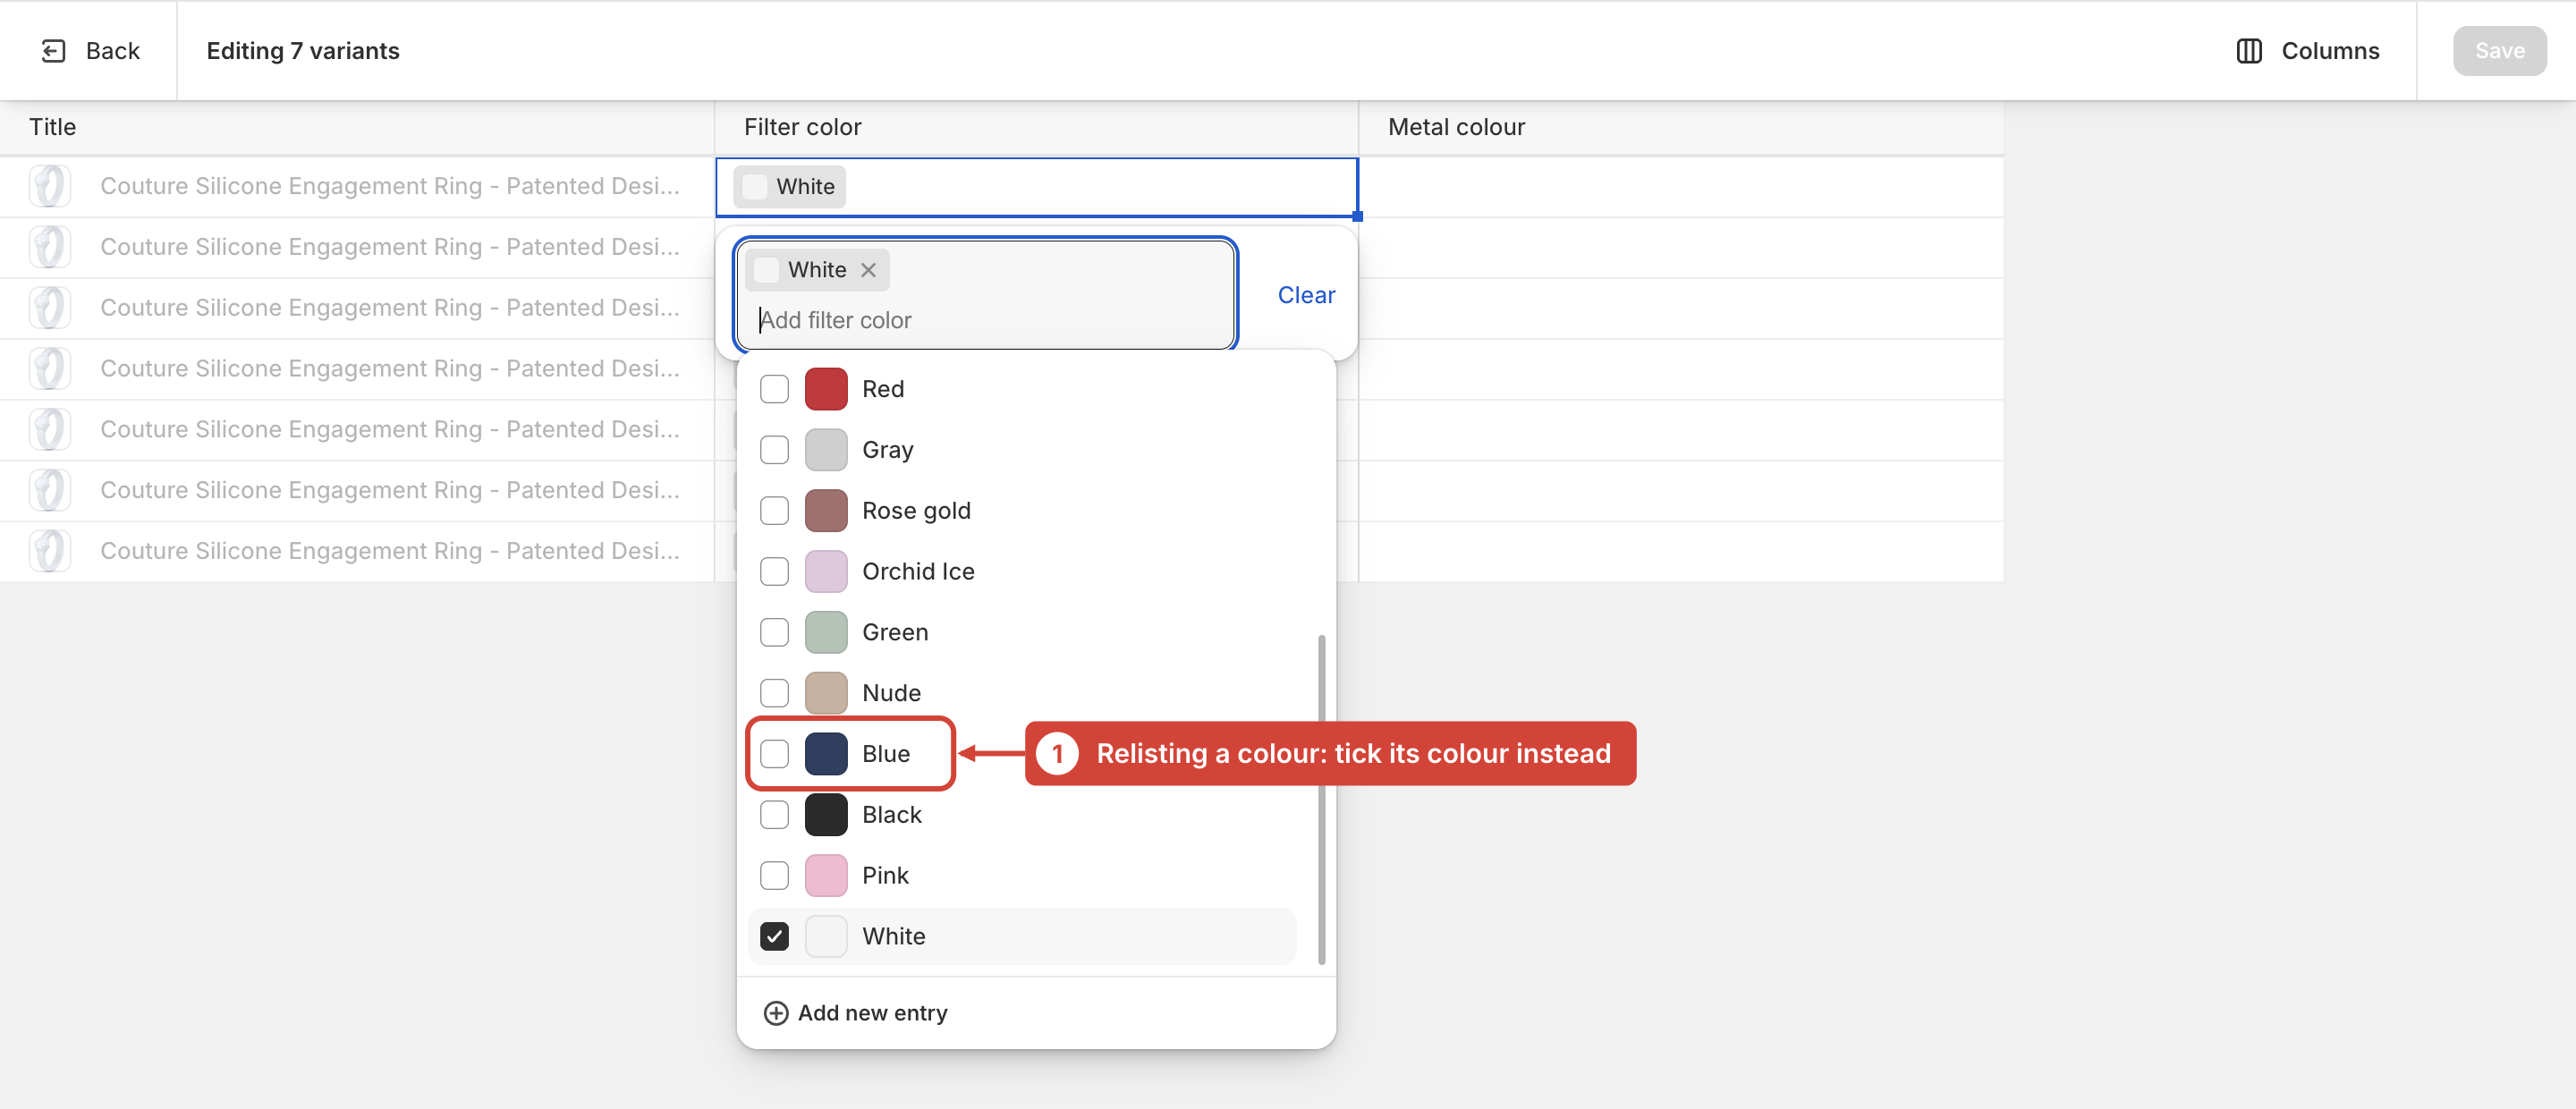
Relisting: tick the colour instead
Same cell, same Enter — but tick the ring's colour in the list. For rings with metal, open the Metal colour cell and tick the metal (Gold, Silver, Rose gold or Gunmetal). Two-tone rings can have two colours ticked.
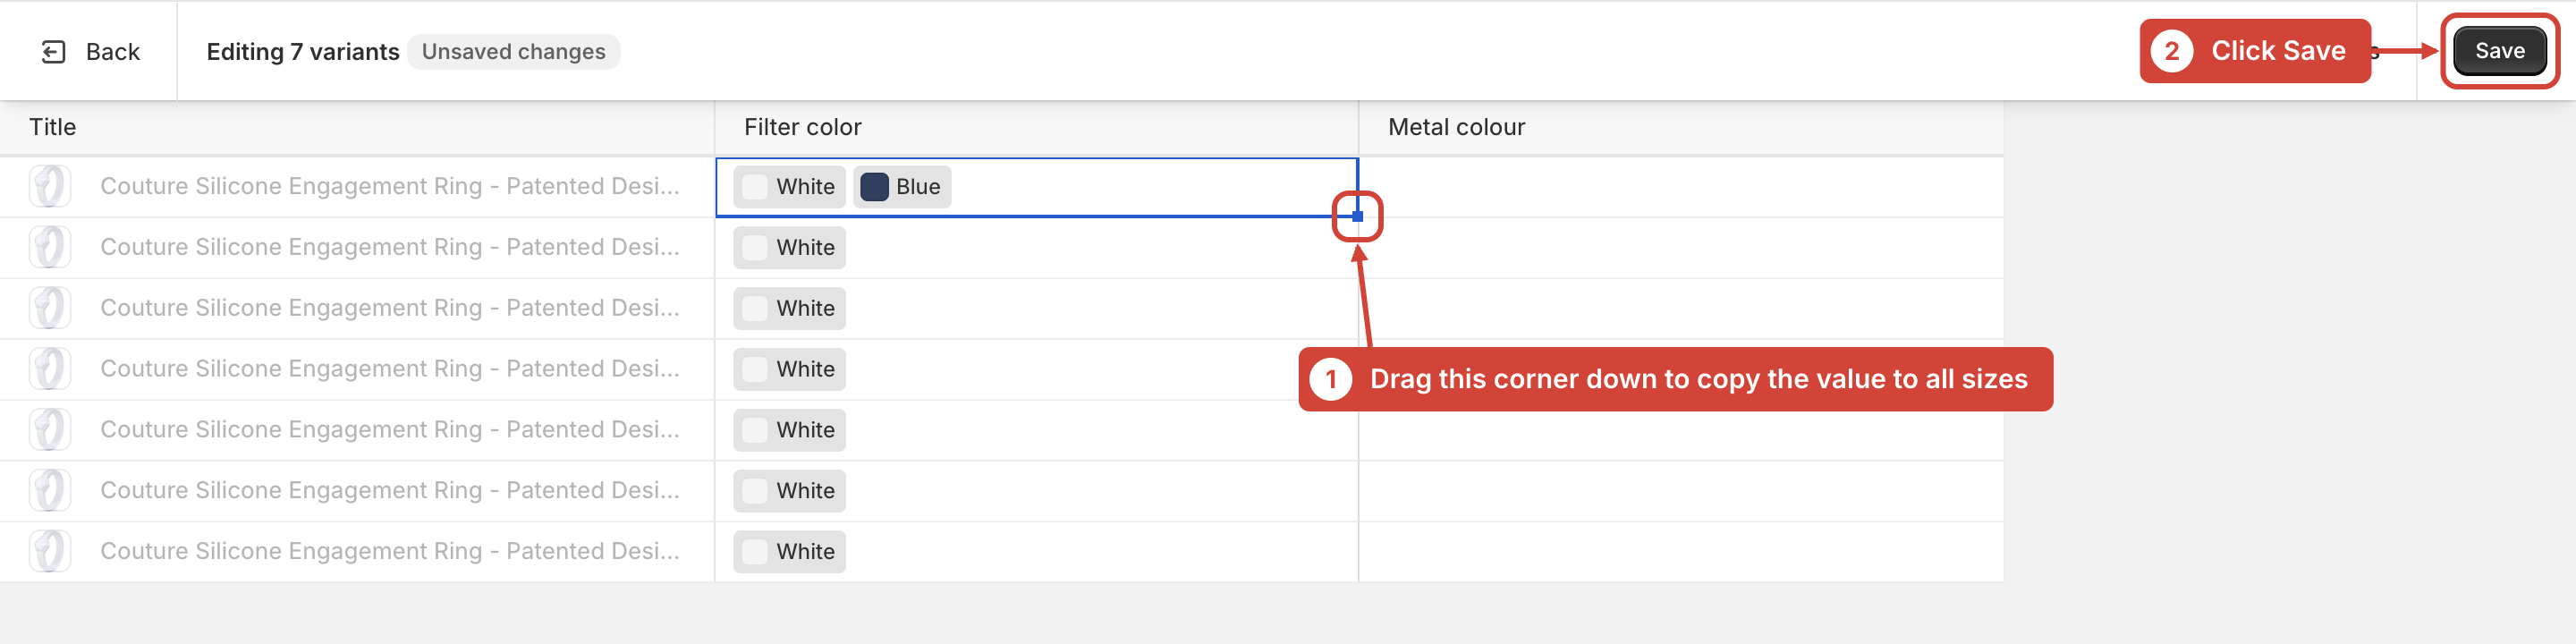
Copy to every size, then Save
Drag the small square in the corner of the edited cell down over the other rows — the value is copied to all sizes. Click Save. The storefront filter updates within a few minutes.
Prefer not to do this by hand?
A one-click Sync button in your Shopify admin can do all of this automatically: it checks every product, clears the fields for unlisted colours and restores them for relisted ones. One-off setup, about 7 hours of development — just let us know.
Single variant instead of a whole colour: open the variant → Metafields → Filter color / Metal colour → Save.